Mastering Kubernetes:Securing Your K3s Cluster with Authentik Because "Open to Everyone" Is Not a Security Policy

If you've been following along with this series, congratulations! Your cluster is likely up, running, and accessible from anywhere with an internet connection. While that's undeniably cool and convenient, it's also a little too convenient. Your cluster is now as accessible as a street-side lemonade stand—except the customers in this case might be script kiddies or opportunistic bots. To quote Monica and Rachel’s infamous apartment door from Friends: "Come on in! No locks here!"
Clearly, this isn’t what we want. The idea of every endpoint being open to the entire internet feels about as safe as storing your password on a sticky note attached to your monitor (don’t do that, by the way). That’s where authentication and authorization come in. But here’s the catch: some tools come with no authentication at all, while others offer authentication that feels like it was designed by someone who learned about security from a YouTube tutorial.
But fear not! Today, we’ll walk through how to secure your homelab with Authentik—our chosen superhero in the world of authentication and authorization. It’s a bit of effort upfront, but I promise it’s worth it. By the end of this post, you’ll have a bulletproof setup that can guard your cluster like Gandalf shouting, "You shall not pass!"
Picking the Right Tool for the Job
Before I start shoving YAML files in your face, let’s take a moment to talk about why I picked Authentik for this tutorial. Like most things in tech (and life), this decision involves trade-offs. Here’s the quick breakdown of three popular tools:
- Authelia:
Authelia is a lightweight, self-hosted identity management solution that’s great for small environments. It offers robust two-factor authentication (2FA) and has a straightforward YAML-based configuration. However, it’s like a Swiss Army knife with only a few tools—it works, but you might outgrow it fast if you need something more complex. - Keycloak:
Think of Keycloak as the “enterprise-grade everything” option. It’s packed with features like identity federation, OpenID Connect, SAML, and social login integration. But with great power comes great complexity—and server load. Unless you’re running a full-fledged enterprise, Keycloak might feel like using a flamethrower to toast a marshmallow. - Authentik:
The happy middle ground. Authentik is versatile, modern, and strikes a perfect balance between simplicity and power. Its flow-based configuration makes setting up custom authentication workflows a breeze, and it supports modern protocols like OpenID Connect, SAML, and LDAP. While it’s a newer player in the game, it’s quickly gaining traction—and for good reason.
After some trial and error (and possibly a bit of hair-pulling), I settled on Authentik. Why? It offers better granularity for user flows than Authelia and is far less resource-hungry than Keycloak. It’s slightly harder to set up than Authelia, but don’t worry—I’ll walk you through it step-by-step so you don’t have to cry into your YAML files.
Installing Authentik: Helm and Secrets
To get started, you’ll need Helm. If you’ve made it this far without installing Helm, I have to ask: What are you doing with your life? Helm is the package manager for Kubernetes, and by now, it should already be part of your toolbox.
- Run the following command to generate a
SUPER_SECURE_PASSWORD:
pwgen -s 50 1- Next, generate a
SUPER_SECURE_KEY:
openssl rand 60 | base64 -w 0Plug these secrets into your values.yaml file, which customizes your Helm chart installation. Here’s what the file might look like (don’t forget to replace the placeholder secrets):
authentik:
    secret_key: "SUPER_SECURE_KEY"
    error_reporting:
        enabled: true
    postgresql:
        password: "SUPER_SECURE_PASSWORD"

server:
    ingress:
        # Specify kubernetes ingress controller class name
        ingressClassName: traefik
        enabled: true
        hosts:
            - auth.yourdomain.com

postgresql:
    enabled: true
    auth:
        password: "SUPER_SECURE_PASSWORD"
redis:
    enabled: true
values.yaml
With your values.yaml file ready, run the following commands to install Authentik:
helm repo add authentik https://charts.goauthentik.io
helm repo update
helm upgrade --install authentik authentik/authentik -f values.yaml
after a while or so, you can check your resources with
kubectl get all -n authentikif all appears ready then we're good to proceed.
Troubleshooting: The Case of the 404 Page
After installing Authentik, you’ll likely head to auth.yourdomain.com/if/flow/initial-setup/ as per the official docs. And if you’re anything like me, you’ll land on a 404 Not Found page and scream internally. Don’t panic—this is normal.
To fix this, simply delete the authentik-server and authentik-worker pods. This will restart them, and voilà! You should now see the initial setup page. Configure your admin user (aka akadmin), and you’re good to go.
Setting Up Your Authentik Flow
Once Authentik is running, it’s time to create your authentication flow. Authentik operates with Providers and Applications:
- Providers handle authentication logic (e.g., forward authentication).
- Applications consume those Providers.
For this tutorial, we’ll set up a Forward-Auth provider, which acts as a middleware layer in front of your endpoints. If a user isn’t authenticated, they’ll be redirected to the Authentik login page. Once logged in, the middleware adds the necessary cookies and redirects them back to their destination.
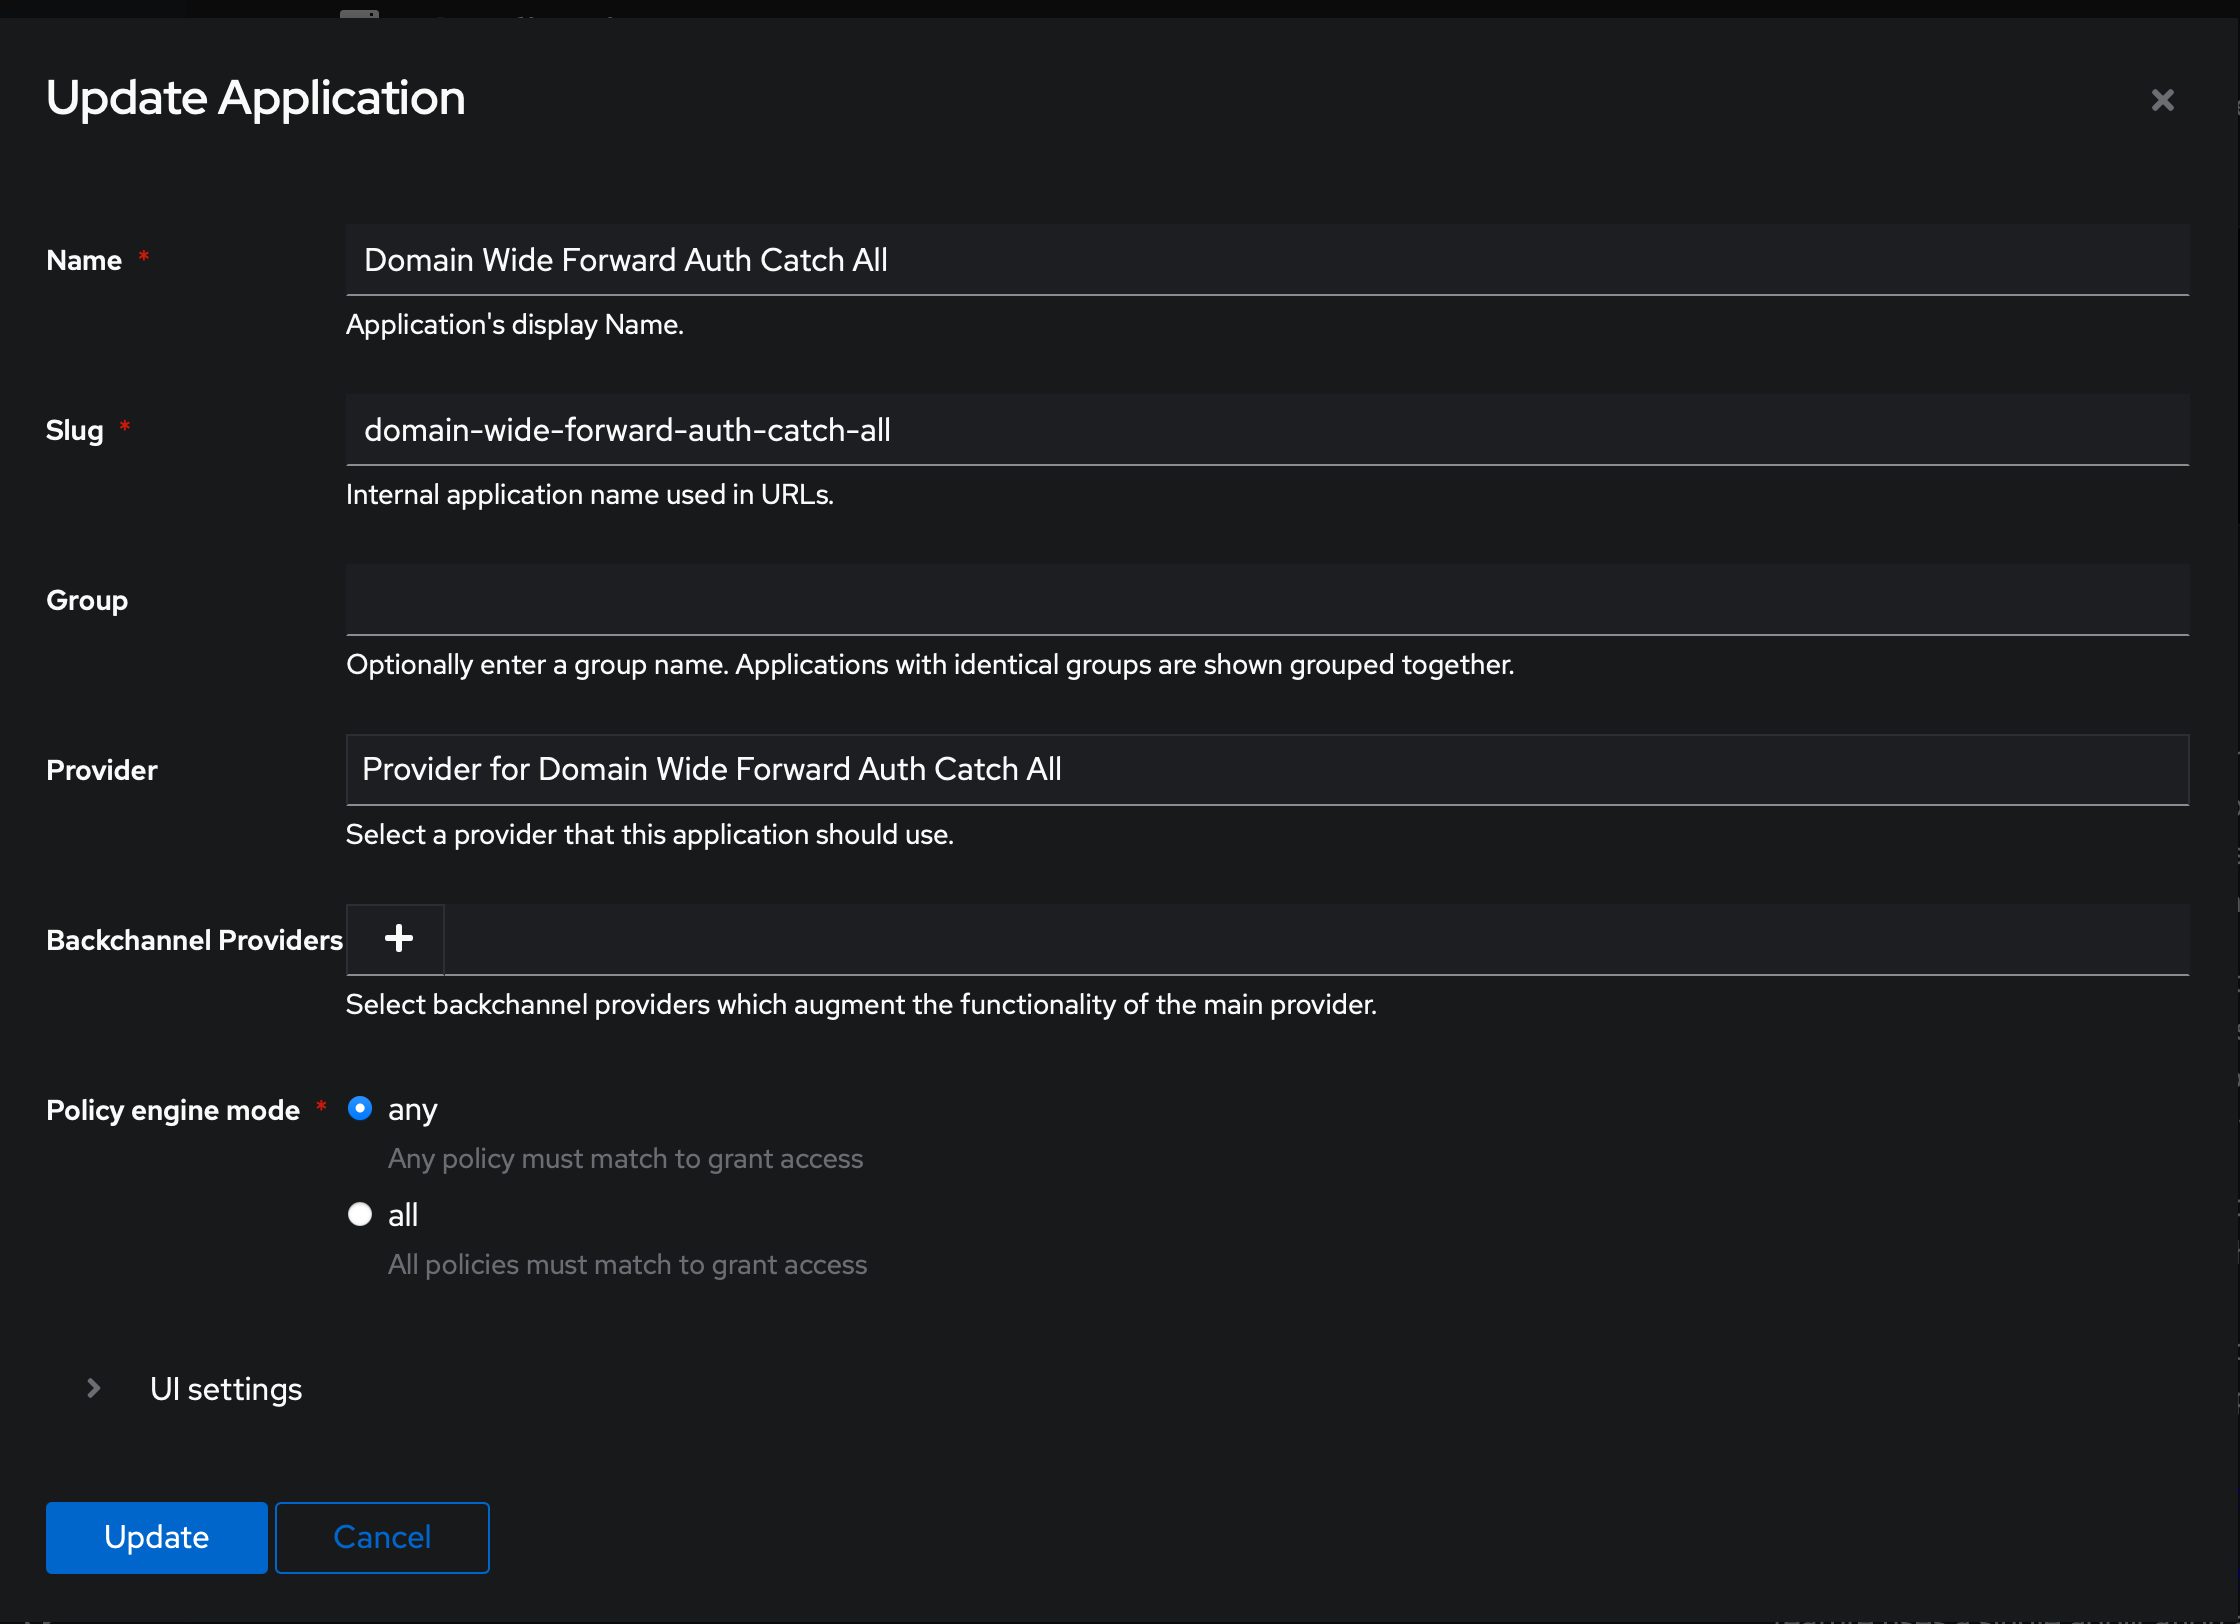
First we need to create a Provider through the Admin Interface's , below is my provider setup, I have chosen Forward-Auth(domain level) which I'll explain shortly. Feel free to configure it to your own liking
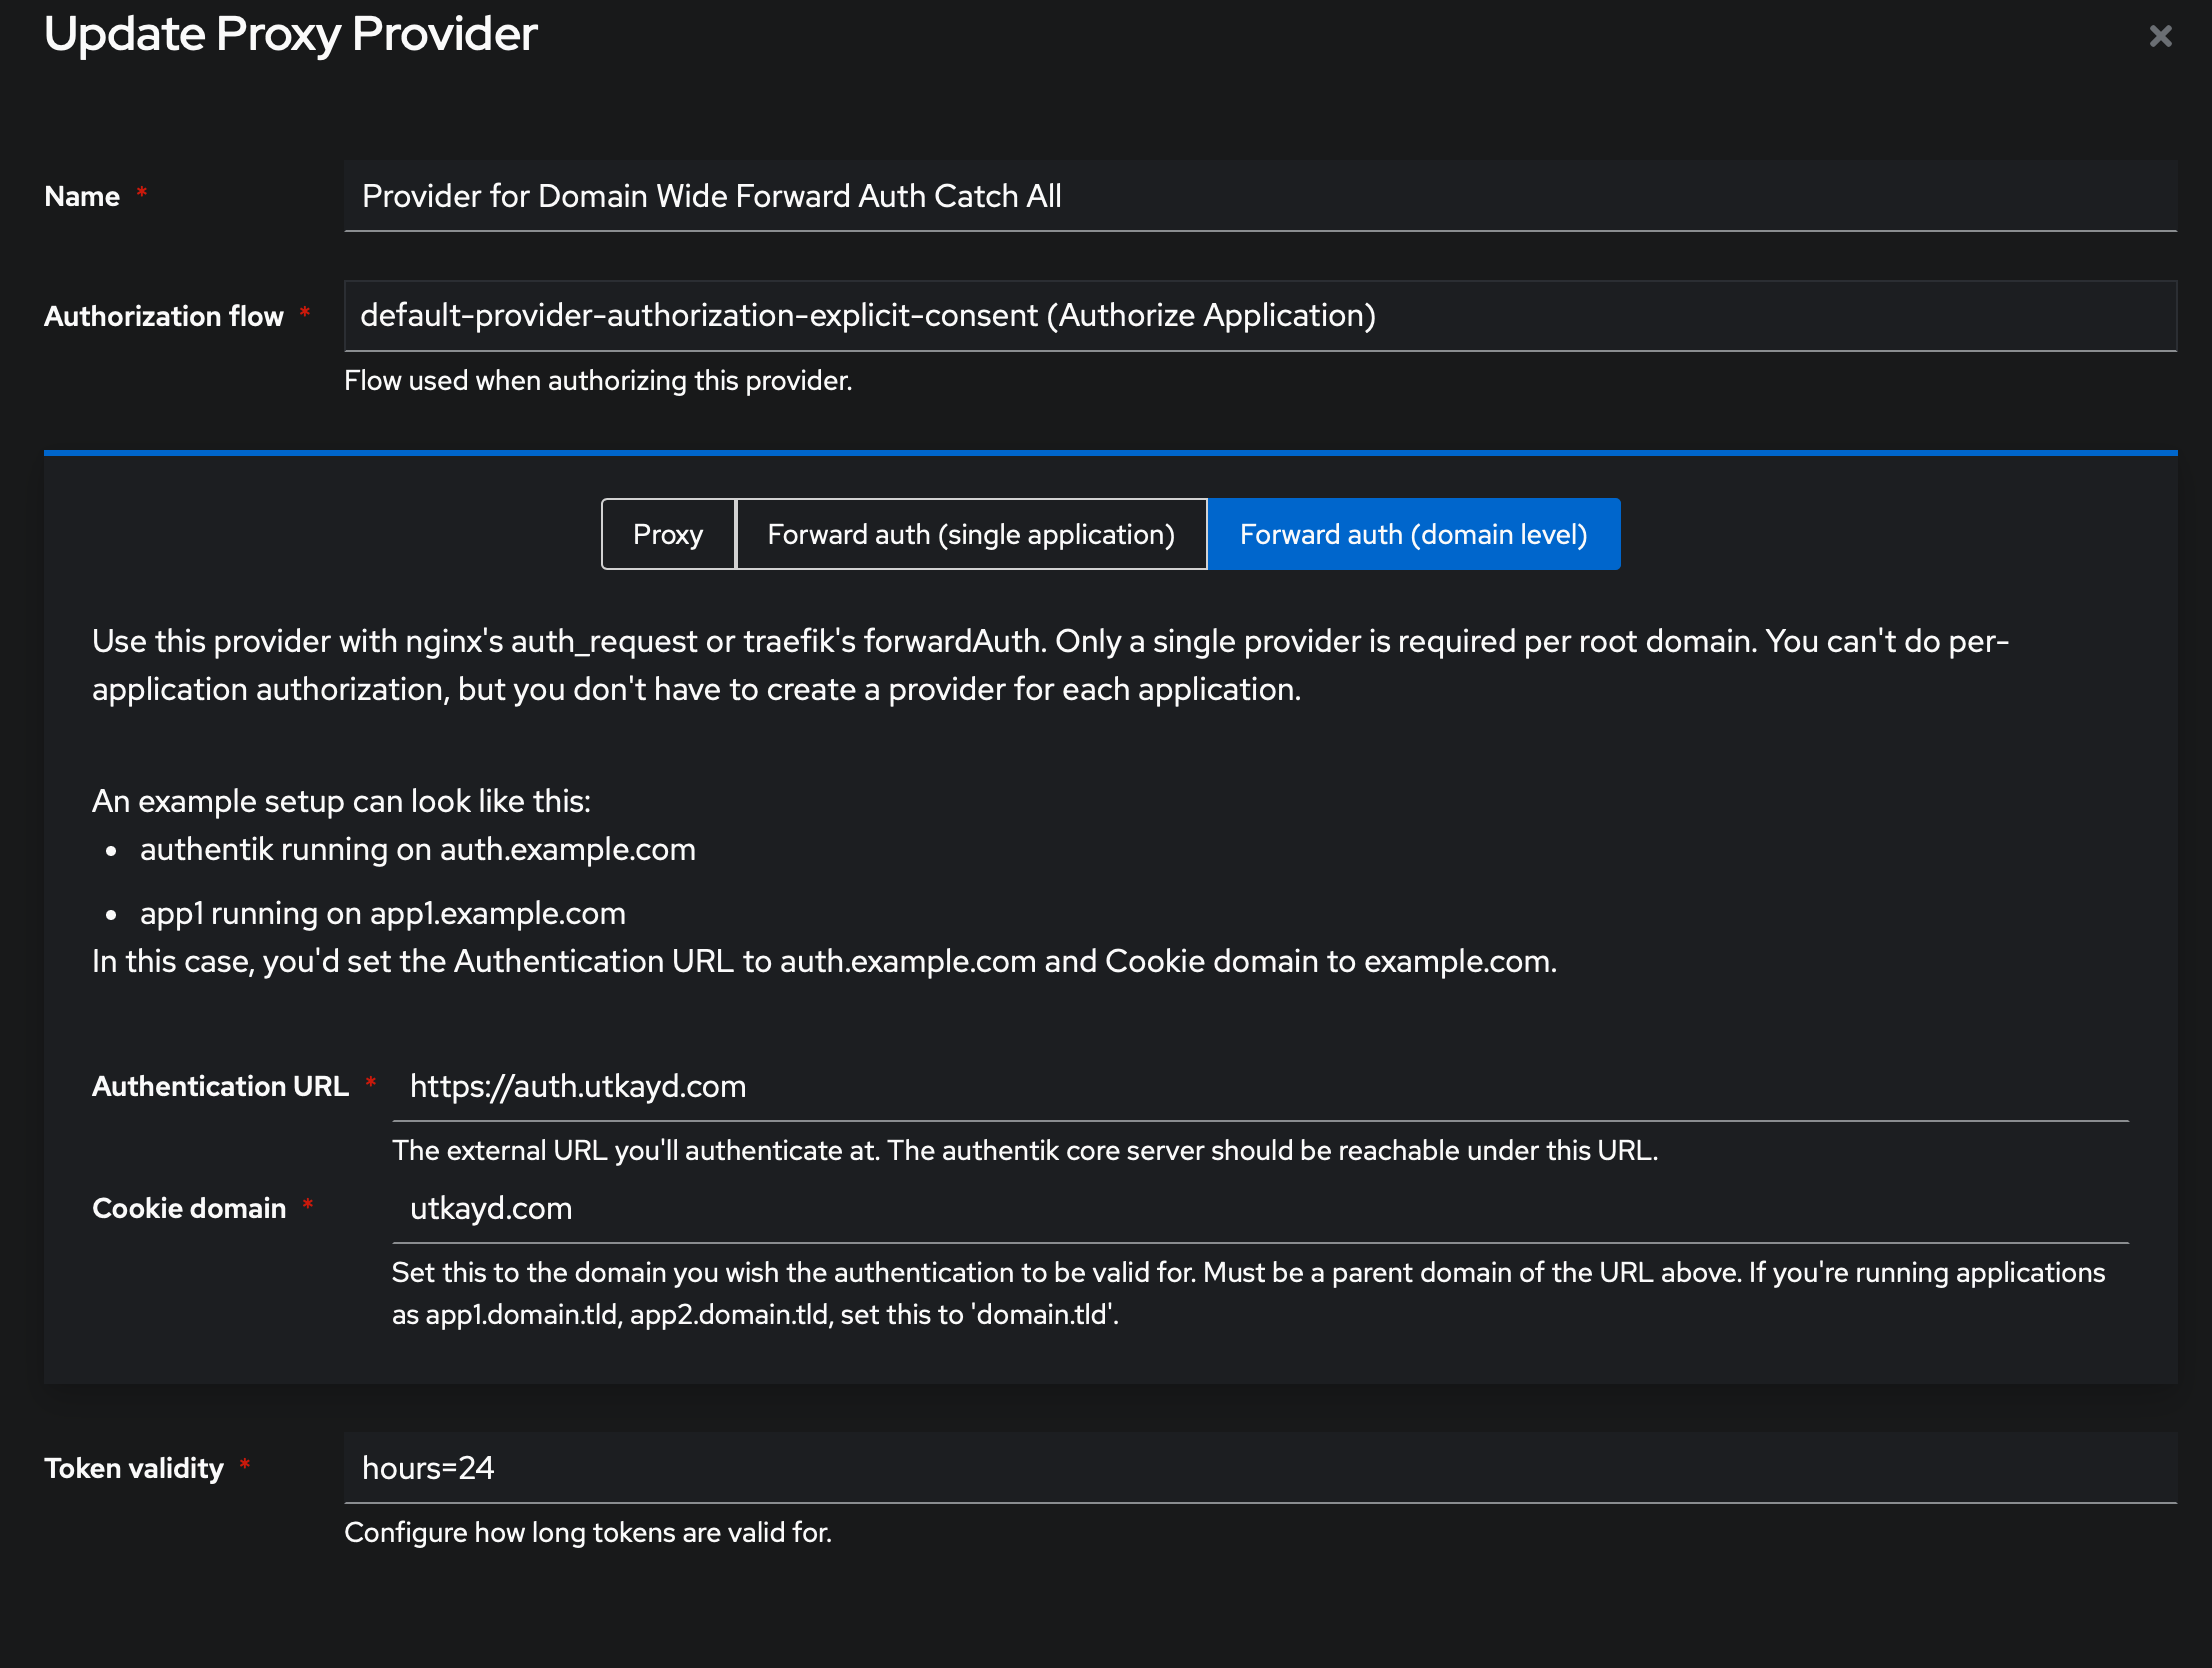
Below is my application configuration for a domain wide, catch-all forward auth, which I know is a mouthful, but all it does is a generic endpoint which is responsible for domain-wide authentication with forward auth, which means we can use it as a middleware, to sit in front of any endpoint for us, and if the user is not authenticated, it'll redirect to the auth page, and once authenticated, it'll inject required auth cookies to the browser (so you're not prompted every single time) and redirects to the intended endpoint. If those cookies are present already, you'll land into your desired endpoint right away.
You should also select Provider>Authentication Settings>Intercept Header Authentication for this to work properly.
And finally here’s what the middleware YAML file looks like:
apiVersion: traefik.containo.us/v1alpha1
kind: Middleware
metadata:
  name: authentik
  namespace: authentik
spec:
  forwardAuth:
    address: http://ak-outpost-authentik-embedded-outpost.authentik.svc.cluster.local:9000/outpost.goauthentik.io/auth/traefik
    trustForwardHeader: true
    authResponseHeaders:
      - X-authentik-username
      - X-authentik-groups
      - X-authentik-email
      - X-authentik-name
      - X-authentik-uid
      - X-authentik-jwt
      - X-authentik-meta-jwks
      - X-authentik-meta-outpost
      - X-authentik-meta-provider
      - X-authentik-meta-app
      - X-authentik-meta-version
authentik-middleware.yaml
Update the address field with your specific embedded outpost service name (use kubectl get svc -n authentik to find it). Then apply the middleware:
kubectl apply -f authentik-middleware.yamlTesting the Setup
To test your shiny new middleware, deploy Traefik’s Whoami service:
apiVersion: networking.k8s.io/v1
kind: Ingress
metadata:
  name: whoami-tls-ingress
  annotations:
    spec.ingressClassName: traefik
    cert-manager.io/cluster-issuer: letsencrypt-prod
    traefik.ingress.kubernetes.io/router.middlewares: authentik-authentik@kubernetescrd
    acme.cert-manager.io/http01-edit-in-place: 'true'
spec:
  rules:
    - host: whoami.yourdomain.com
      http:
        paths:
          - path: /
            pathType: Prefix
            backend:
              service:
                name: whoami
                port:
                  number: 5678
  tls:
    - secretName: whoami-tls
      hosts:
        - whoami.yourdomain.com
---
apiVersion: apps/v1
kind: Deployment
metadata:
  name: whoami
spec:
  selector:
    matchLabels:
      app: whoami
  replicas: 1
  template:
    metadata:
      labels:
        app: whoami
    spec:
      containers:
        - name: whoami
          image: traefik/whoami:v1.9.0
          ports:
            - containerPort: 80
---
apiVersion: v1
kind: Service
metadata:
  name: whoami
spec:
  type: ClusterIP
  ports:
    - port: 5678
      targetPort: 80
  selector:
    app: whoami
whoami.yaml
Apply the configuration and visit whoami.yourdomain.com. You should see a beautiful login screen, courtesy of Authentik.
Wrapping Up
With Authentik in place, you’ve just transformed your homelab into Fort Knox. Whether it’s securing applications, enabling 2FA, or delegating authentication for tools like ArgoCD, Authentik has you covered. Stay tuned for the next post, where we’ll dive even deeper into advanced flows and integrations!
Until then, happy clustering—and remember, YAML is your friend (most of the time).